Choosing tyres and tubes can be a minefield. There is so much choice out there. Here is a handy guide to help you understand tyre and tube choice
When choosing a tube for your tyre, the first thing you need to do is identify the valve. The two main valve types you will see are Presta and Schrader
Schrader is the easiest to recognise as it is the same valve as used on a car tyre. It has a removeable valve core and is fatter than Presta. To pump it up, you simply remove the cap and fit a schrader compatible pump head.
Presta valves are usually fitted to higher end bikes and bikes with narrower tyres. To pump them up, remove the cap, unscrew the top of the valve core and fit a presta compatible pump head.
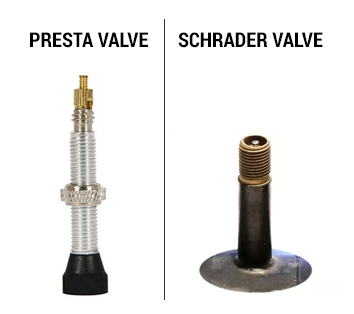
We don't recommend you mix valve types on your bike as pump heads are not always (easily) compatible with both at the same time. Schrader valves are wider too so won't fit into a Presta valve rim hole. We recommend you retain the valve type your bike came with but if you do want to choose, go with Presta as it was designed specifically for bikes. The only other thing to consider is if you intend to insert sealant to prevent punctures. Schrader valves are fine but Presta need to have a removeable core so check first.
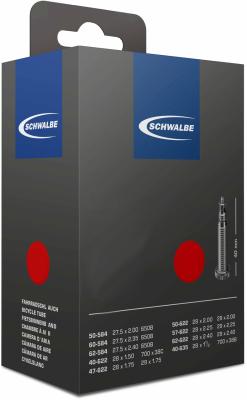
Choosing a tube size isn't too difficult. You just need to know your wheel or tyre size/diameter which will be shown on your tyre wall. You will see a metric ETRTO size and an imperial size. It is confusing and not an exact science because there are so many standards so if you need help or you are not sure just ask one of our team.
An example ETRTO size may say 40-622. Here the rim diameter is 622mm (700c or 29") and the tyre width is 40mm
An example imperial tyre size may say 27.5x2.4. Here the tyre size is 27.5 inch and the tyre width is 2.4 inches.
Tubes expand when pumped up so they will always be suitable for a range of tyre sizes which are normally printed on the box. If you tyre size falls within this range and the valve is correct, that is your tube
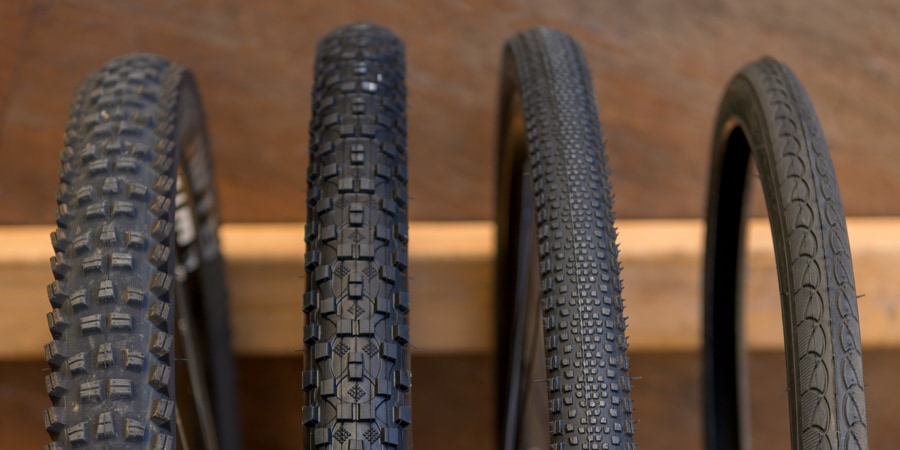
Things to think about when choosing a tyre are bead, tread pattern, width and compound
Tyres have two types of bead, folding and wired. If you see a tyre in a box or your take it off and can fold it up then it has a folding bead. Wired beads are often found on cheaper, heavier tyres and cannot be folded. They are sold in the shape they are meant to be. Folding tyres are more expensive and can be more supple and easier to fit.
Tread pattern is quite simple. The smoother the tyre, the better it will roll on smooth surfaces. These are ideal for tarmac. As you head off road you can fit increasingly more knobbly tyres to attain more grip on looser surfaces. So for simple forest roads, parks and canal towpaths a small, knobbly tread pattern may be suitable to offer some grip but not be too grippy on tarmac. Or pehaps a smooth central bead and knobbly tread on the shoulder of the tyre. For the most extreme mountain biking you will need a heavy, knobbly tread for the most traction on loose surfaces.
Tyre width follows a similar pattern to tread in that the narrower you go the harsher and faster it is. As you go offroad tyre choice tends to get wider to accompany a suitable tread. Wider tyres are more comfortable too. The widest tyres tend to be reserved for the most extreme mountain biking to achieve the most traction.
Compound choice tends to be reserved for electric mountain bikes. Higher end tyres are made with more technically advanced, supple compounds that are lighter and grip better. Think Formula One and softer tyres for qualifying. This the same application. They are always more expensive and normally wear quicker too.
Solid tyres aside, it is impossible to 100% stop punctures happening but there are a few things you can do to almost eliminate them. Let us explain the different options and the pros and cons of each
Tyres
You can always buy tyres with additional puncture protection built into the carcass. A good example of this and our best selling tyre upgrade the Schwalbe Marathon Plus which is widely regarded as the most puncture-proof tyre on the market. The compromises are weight, they are heavier. They are more expensive and sometimes less supple and harder to fit and remove.
Tubeless
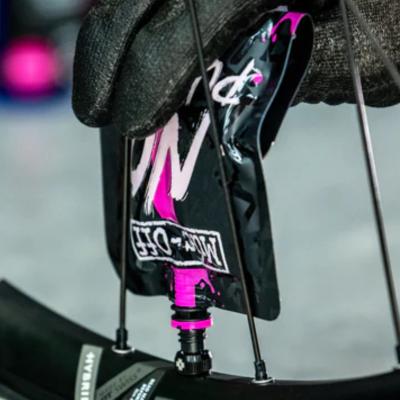
A tubeless setup requires a number of elements to work. Tubeless compatible rims and tyres, tubeless rim tape, tubeless valves and sealant. The rim is taped to seal the spoke holes and a special tubeless valve is fitted. Sealant is added and the tyre is pumped. Tubeless tyres roll better than tubed and the puncture protection works by inertia coating the inside of the tyre with sealant. When it punctures the tyre pressure forces a tiny amount of sealant out which seals the hole. Tubeless conversion is expensive and can be messy. Additionally the sealant needs to be checked and topped up every 3-6 months but it firmly remains the most popular choice for mountain bikers.
Self-Sealing Tubes
These are inner tubes with self-sealing sealant inside them. They work like a tubeless tyre setup without the mess. You can buy pre-filled tubes or normal tubes (with removable valve cores) can be converted by adding sealant to them retrospectively. The compromise is the weight and they won't roll as well as tubeless or standard tubed setups.
Belt and Braces
If you want to almost eliminate punctures, we would recommend a tyre with additional puncture protection with seal-sealing tubes fitted. The tyre will help protect against bigger punctures and cuts and if you do puncture the sealant will seal the hole. If the tyre does go down with this approach, from our experience, it normally means a new tyre and tube.